May. 25, 2021
How To Repair The Ignition Coil
The vehicle’s ignition system must provide enough sparks for the right cylinder at the right time, thousands of times per minute. Precise ignition maintenance is absolutely necessary.
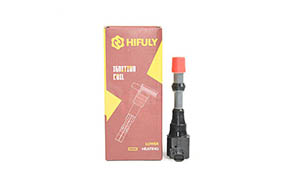
For combustion to occur, a spark is needed to ignite the air-fuel mixture in the engine. This is the job of the ignition coil. This is a transformer that converts the low voltage of the battery (usually only 12 volts) into thousands of volts, thereby skipping the spark plug gap, igniting the fuel, and finally starting the engine. Some systems require only one coil to do this, however, most new cars use an individual coil for each cylinder.
If you suspect an ignition coil failure, just follow the steps below to simplify your diagnosis:
Use diagnostic tools to read any fault codes and live data. Compare the value of the suspected faulty coil with the value of the normal working coil.
Check the coil for any signs of damage, such as cracks in the housing, broken anti-rotation labels, or damaged wires or plug connections.
In addition, disassemble and inspect the spark plug. Check the spark gap and plug wires, if applicable, to ensure that the resistance of the wires is within specifications.
After the ignition switch is turned on, use a multimeter to measure the voltage of the ignition coil. Voltages greater than 10.5V should be recorded.
Again, use a multimeter to check the primary and secondary circuits of the coil. The main resistance of most coils should be between 0.4 and 2 ohms, and the secondary resistance should be between 5000 and 20000, but please refer to the specifications of the car manufacturer. If one of them does not meet the specification, replace it. A reading of zero means the coil is short-circuited, and a high reading means the coil is open. When an ignition coil has three, four, five, or seven wires, the reference wiring diagram will show the electrical design of the internal coil.
Once the fault is confirmed, follow the simple steps below to replace the coil:
The vehicle ignition switch is turned off and the faulty coil is found. Unplug the electrical connector, and then unscrew the bolt that secures it. You should now be able to carefully lift the coil out of its installation.
Before installing the new coil, it is best to apply dual electric grease to the bottom of the new coil and its electrical socket. This will prevent corrosion and ensure a good connection. It is also recommended that you replace all spark plugs with the coil at the same time.
Now slide the new coil into its housing. Tighten the bolts to the recommended torque, and then reconnect the electronic connector.
Reconnect the diagnostic tool to clear any fault codes and turn off the engine management warning light.
Carry out road tests to make sure everything is in good working condition.
We are Ignition Coil Suppliers. Please feel free to contact us if you are interested in our products.

Quick Links
Tel.: +86 135 7412 6921
Mob.: +86 135 7412 6921
E-mail: hifuly@foxmail.com
Skype: linda.hava
WhatsApp: +86 135 7412 6921
QQ: 2850162377
Follow Us